
The optical jewels at Sorrento.
My recent visit to the ocean beach at Portsea sparked a craving for more of the same photographic material.
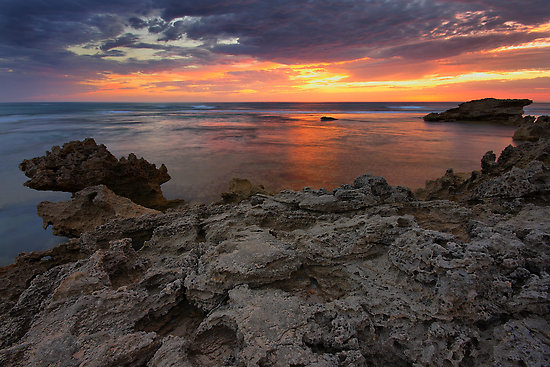
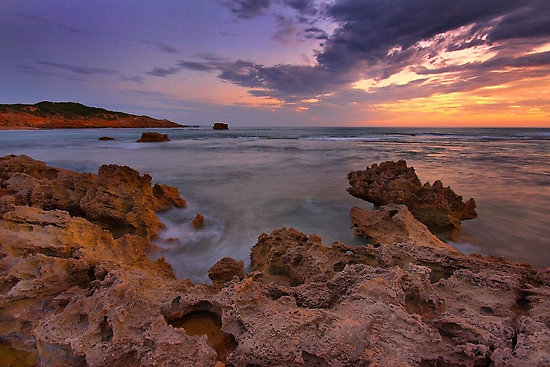
This time I visited the ocean beach further along the coastline at Sorrento. The first visit to the beach was a spur of the moment decision. When I arrived there the sun was hovering just above the horizon, I had no time to explore the beach and it was a high tide. I took a few shots of the sun fading into the horizon and a few long exposure shots of waves swirling around the rocks.
Here’s a couple of the high tide shots –
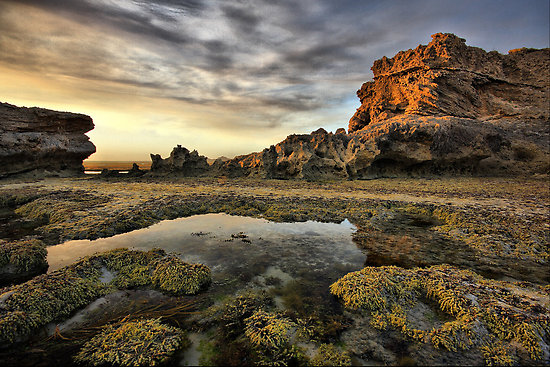
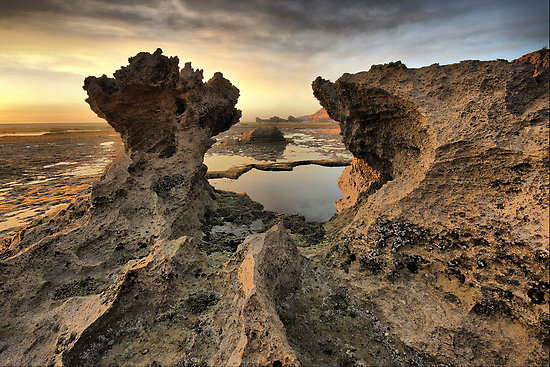
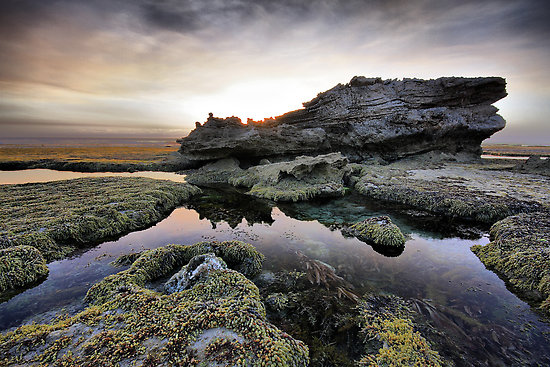
The next visit to Sorrento beach was a bit better planned and I actually remembered to check the tide charts before leaving. On arrival the rock pools were at their low tide best, the sun was high enough in the sky to give me time to explore some of the rocky features yet low enough to give the area a nice warm glow.
Here’s some of the shots from the low tide visit –


Okay…so I am in love with these as well. Would you be willing to share your settings for some of these shots. I understand the long exposure, to get the water motion like that, but how do you keep the shot from getting overexposed? I have not tried long exposures yet. You can direct me to some reading on this, if you would rather. or just say “figure it our yourself.” LOL and I will.
Thanks for sharing these photos. they are really inspiring.
January 14, 2008 at 6:21 pm
Hi Corey,
The theory is that we want to achieve a long exposure with a small aperture (ie.a high aperture number).
We want the long exposure to blur the motion of the water, and a high aperture number to give us a deep depth of field.
We want a deep depth of field so the landscape in focus from the foreground right back into the background.
First of all you will definately need a tripod or some kind of stable platform for this.
You will need to take your camera out of AUTO mode and use shutter priority mode.
A nice starting point would be to try for an exposure time of say 15 seconds then review the shot and adjust longer or shorter til you achieve the amount of “silky mist effect” that you want.
Now, to prevent over exposure there are several variables you can adjust.
1- shoot at dusk or dawn when the ambient light is low.
Night time is also good with a nice moon. (Low light is your best friend here)
2- darken the scene by shooting through a filter.
(In my case I was using a circular polarizing filter in order to reduce the amount of reflected sky glare on the rock pools.)
3- change your camera’s ISO setting from auto to whatever its lowest ISO number is.
(in my case it was ISO 100)
4- shoot using a small aperture (that means a high aperture number)
(in my case I was shooting with an aperture number of F11 or greater)
Hopefully these tips might help you.
Feel free to contact me if you need further clarification of any points.
Cheers, Jim.
January 14, 2008 at 11:39 pm
Oh… this and the comments really clears it up for me, because when I tried this with 35mm it over exposed.. but not with my diggie.
January 16, 2008 at 12:57 pm
Thanks Jim. I had still been thinking about it after I left the comment and it dawned on me to use a smaller ap. duh…. LOL
but your advice on the dawn and dusk is great. I also have a polarizing filer I haven’t used.
oh and using Shutter priority is a great advice as well, as I would have tried Manual (as that is what I strictly shoot in) and had a lot of trial and error. With shutter priority, the camera should choose a nice ap.
Thanks! You rock.
January 16, 2008 at 10:23 pm